Setting up a charity on Entry Ninja is a simple process that allows you to associate charitable organizations with your events. Follow these steps to effectively set up and manage charities for your events:
1. Accessing Charity Management:
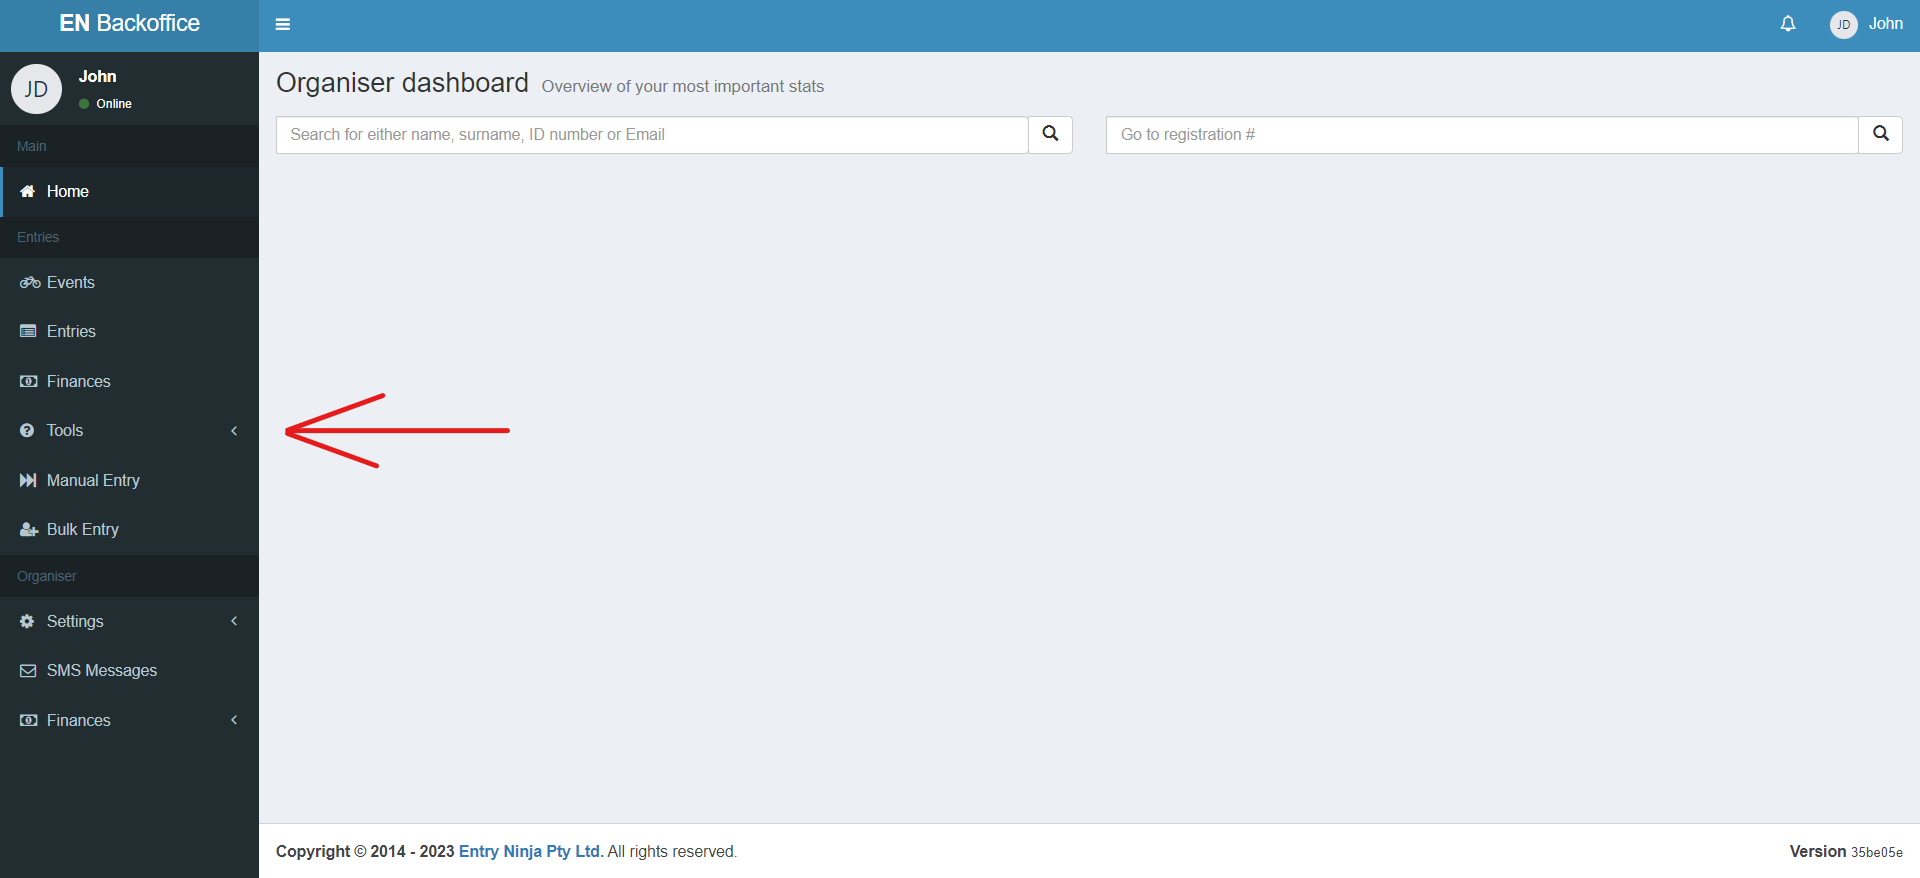
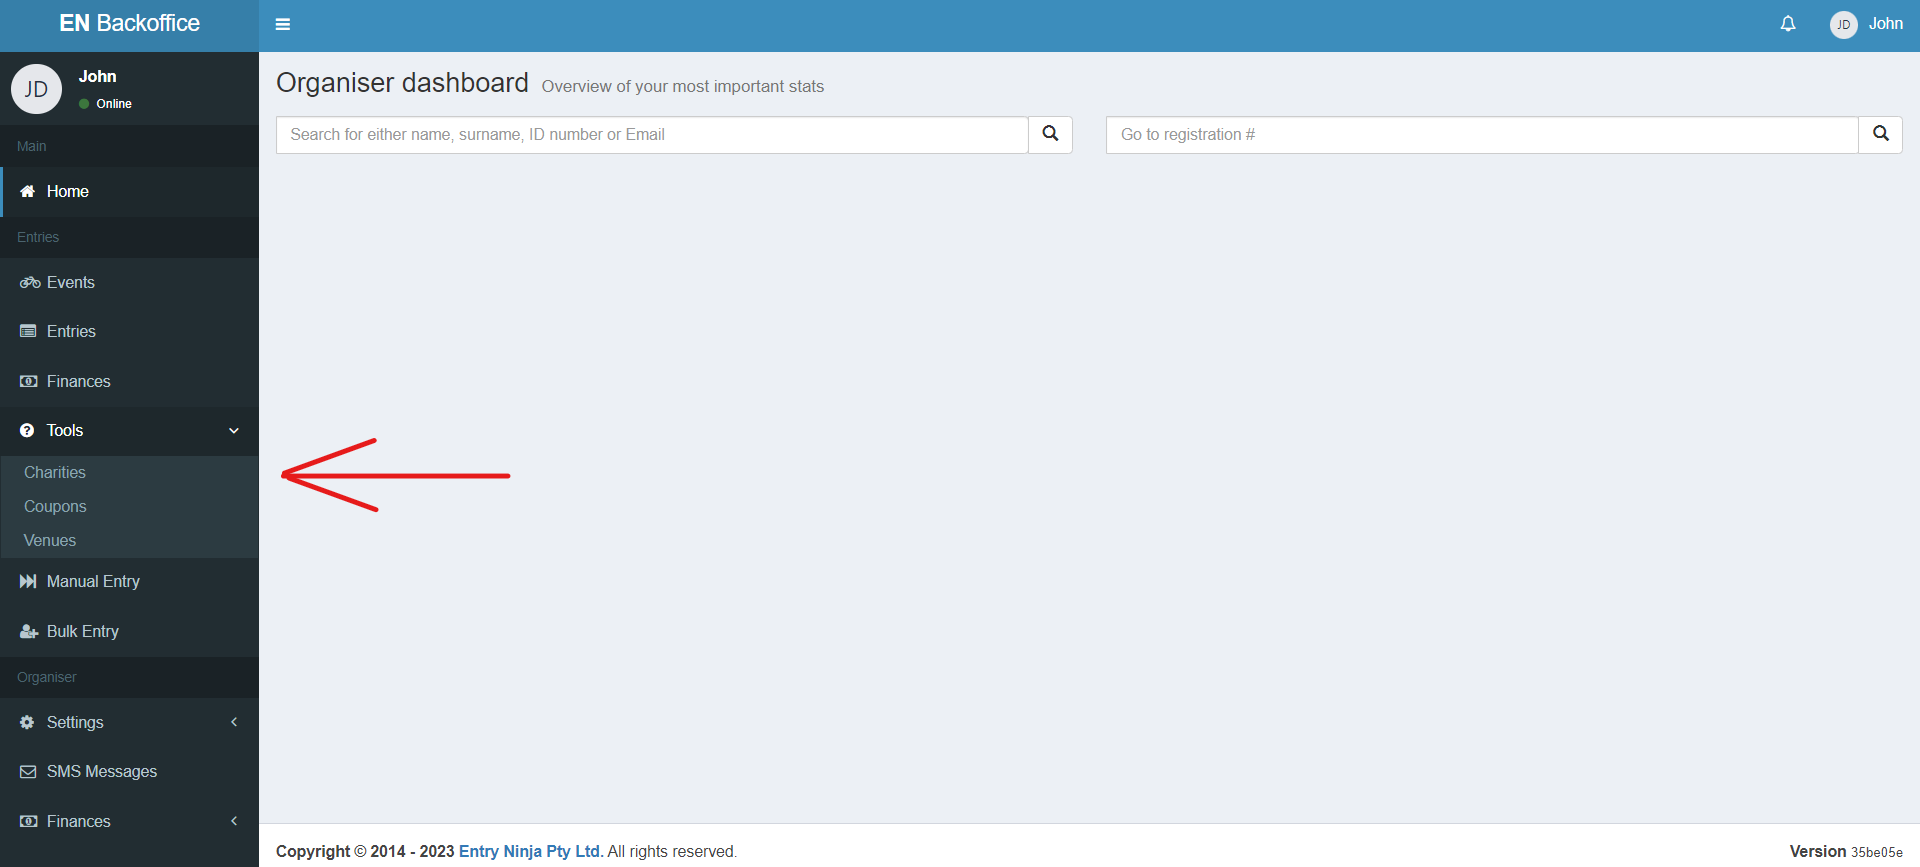
- From the main navigation menu, click on the "Tools" dropdown.
2. Navigating to Charities:
- Select "Charities" from the dropdown options. This will take you to the Charity Management view.
3. Viewing Existing Charities:
- Upon accessing the Charity Management view, you'll find a list of existing charities.
4. Editing an Existing Charity:
- To edit an existing charity, locate the charity you wish to edit and click on the yellow "Edit" button associated with that charity.
5. Adding a New Charity:
- To add a new charity, click the blue "Add Charity" button located in the top corner of the page.
6. Charity Form:
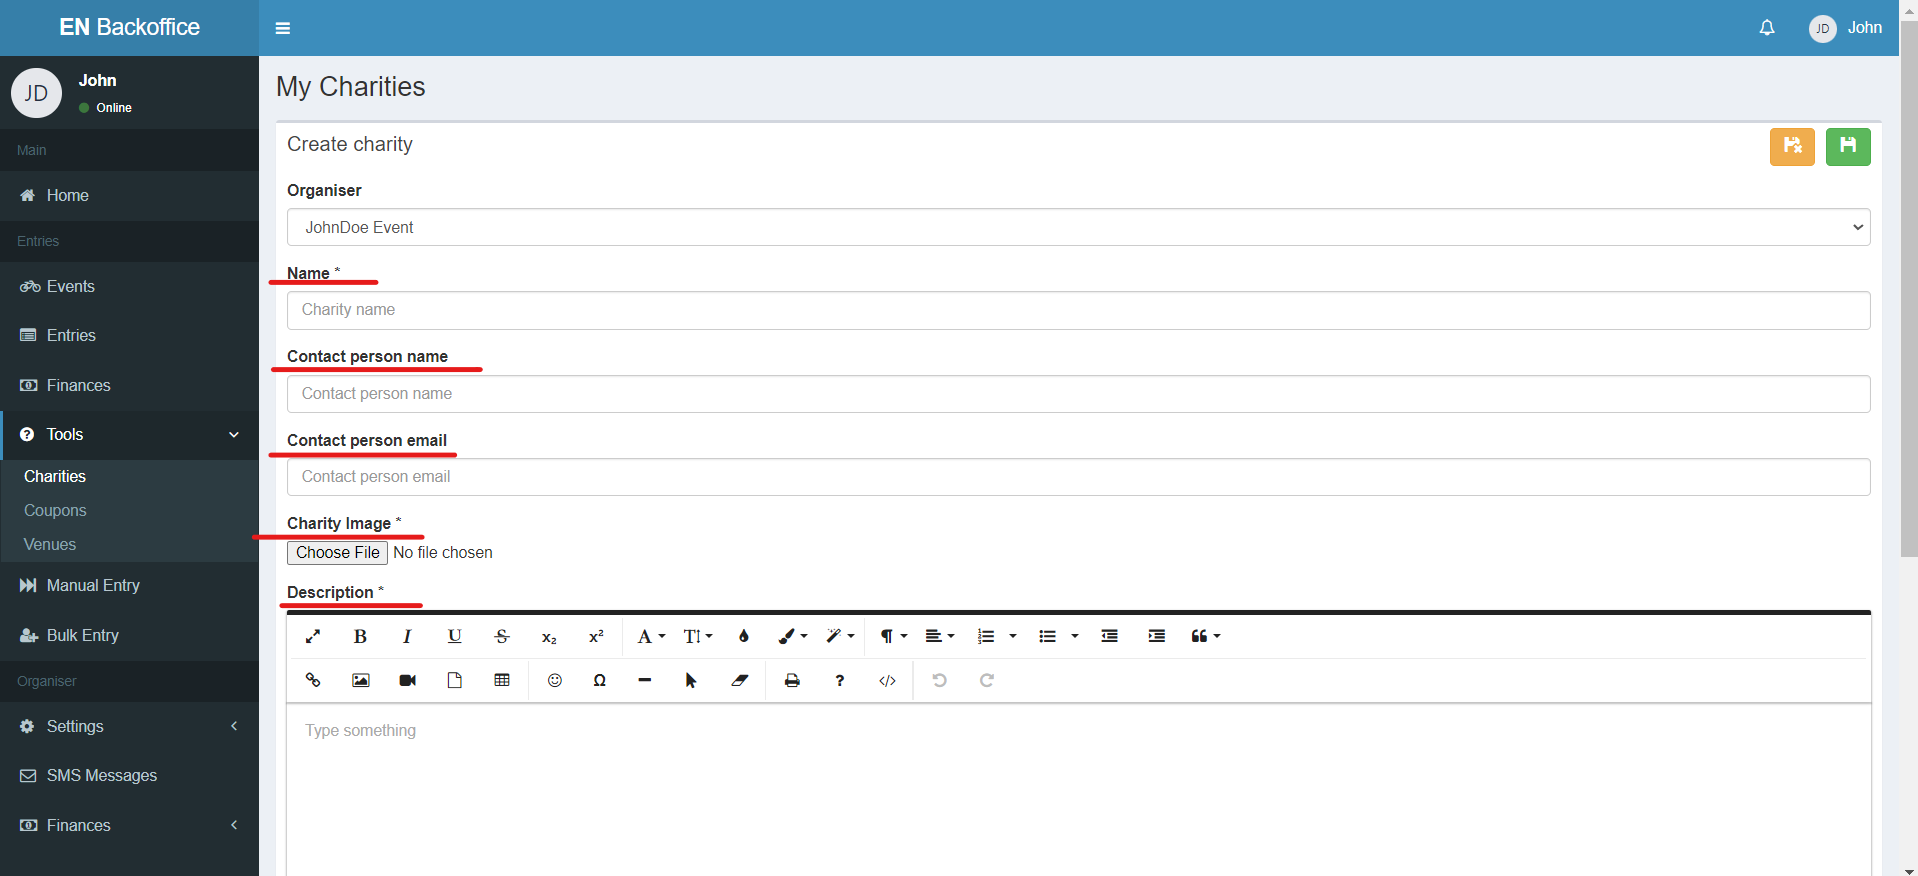
- A charity form will be displayed, prompting you to provide essential details about the new charity.
7. Providing Charity Information:
- Complete the required fields in the charity form. Fields marked with an asterisk (*) are mandatory and must be filled out.
8. Saving the Charity:
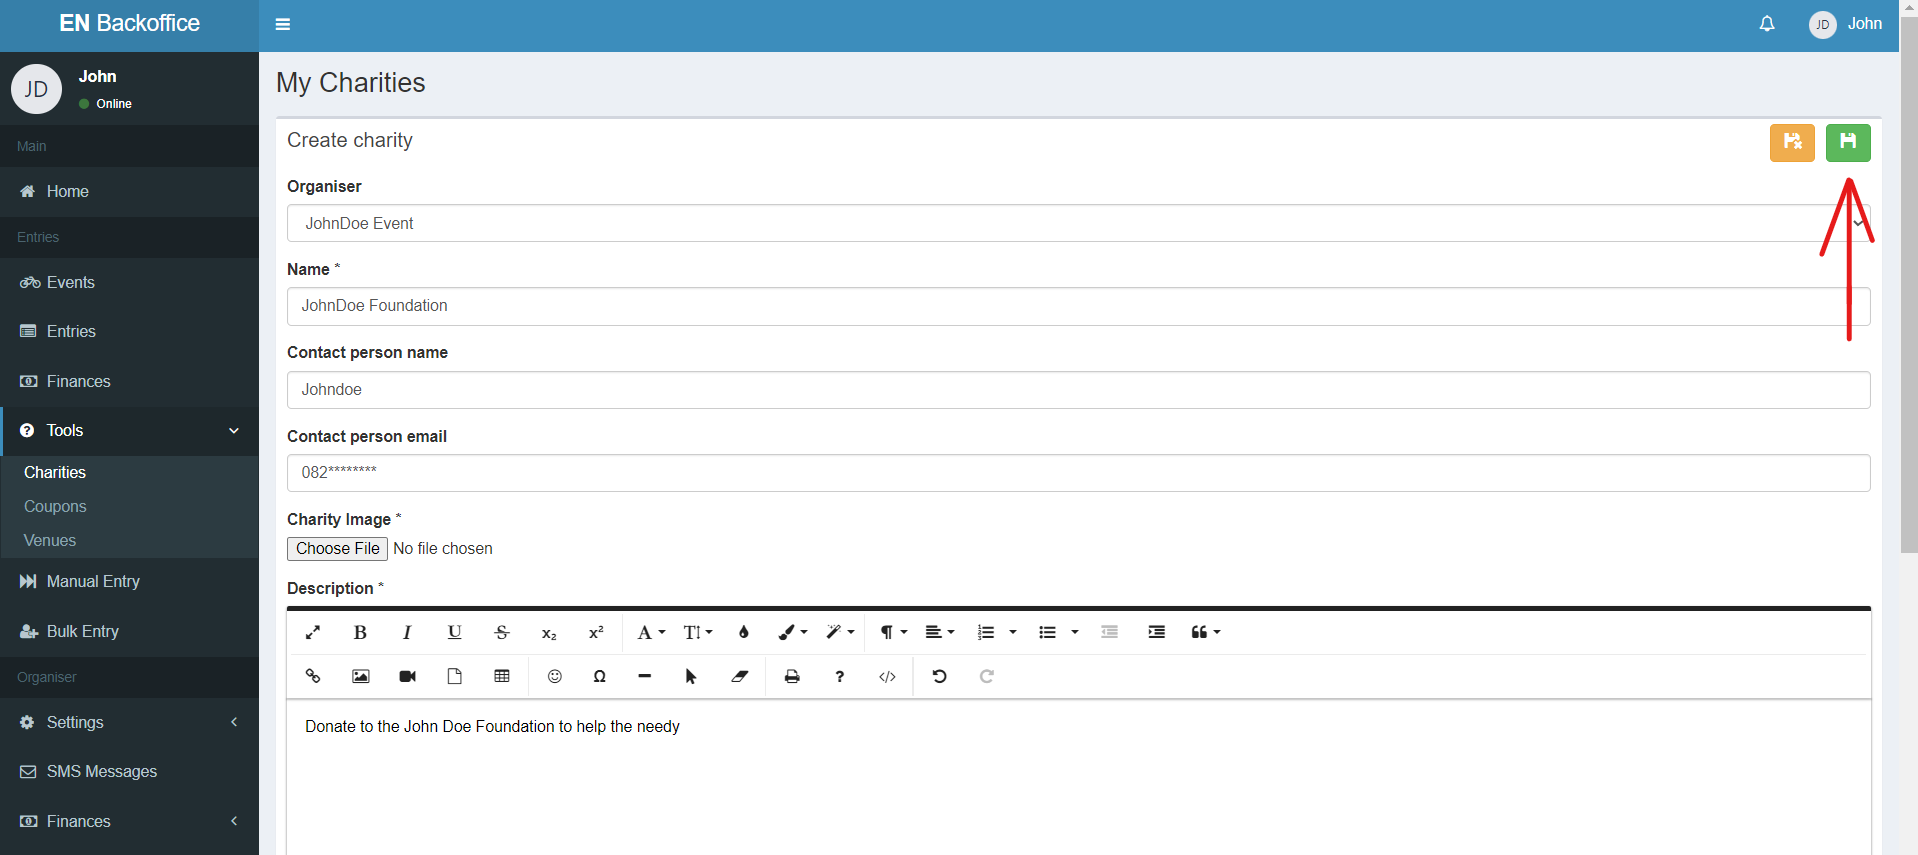
- After filling out the charity form, click the "Save" button to save the new charity. The information will now be stored among your list of charities.
9. Selecting Charity for Event Creation:
- When creating a new event, you can select the newly added charity from the list of available charities. This associates the event with the chosen charitable organization.
Setting up a charity allows you to connect meaningful causes to your events and engage participants in contributing to charitable efforts. Follow these steps to seamlessly manage charities and enhance the impact of your events.


