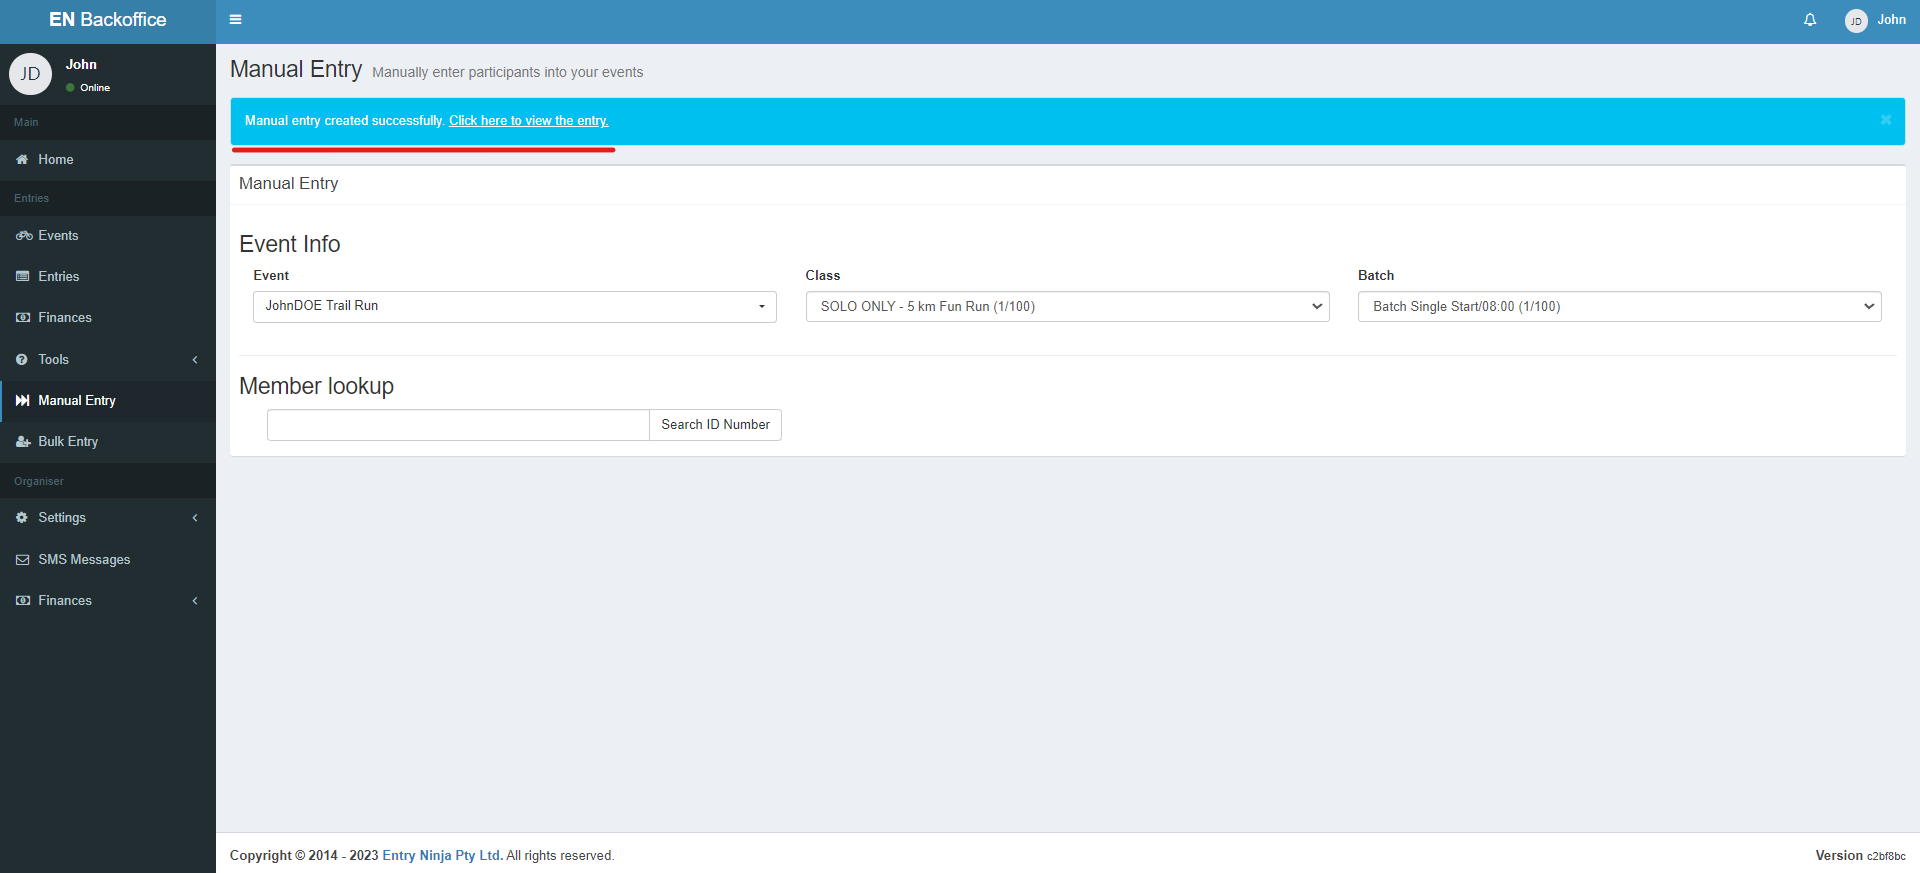
Step 1: Navigate to "Manual Entry"
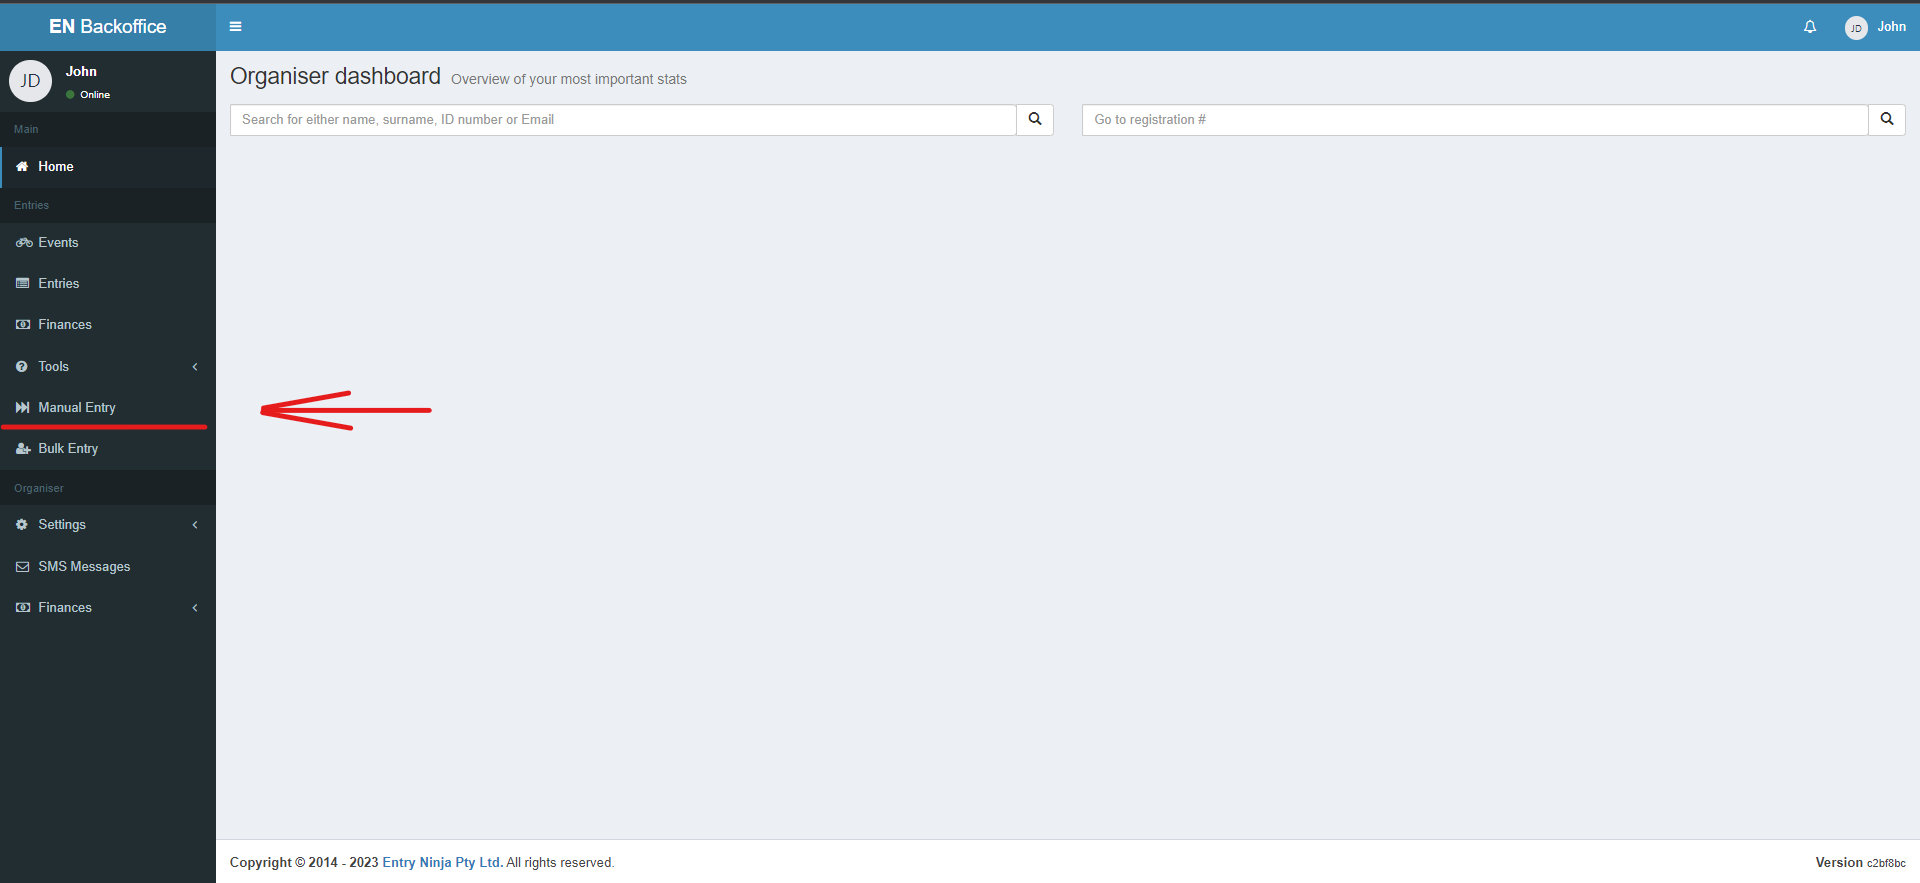
1. Log in to your Back Office.
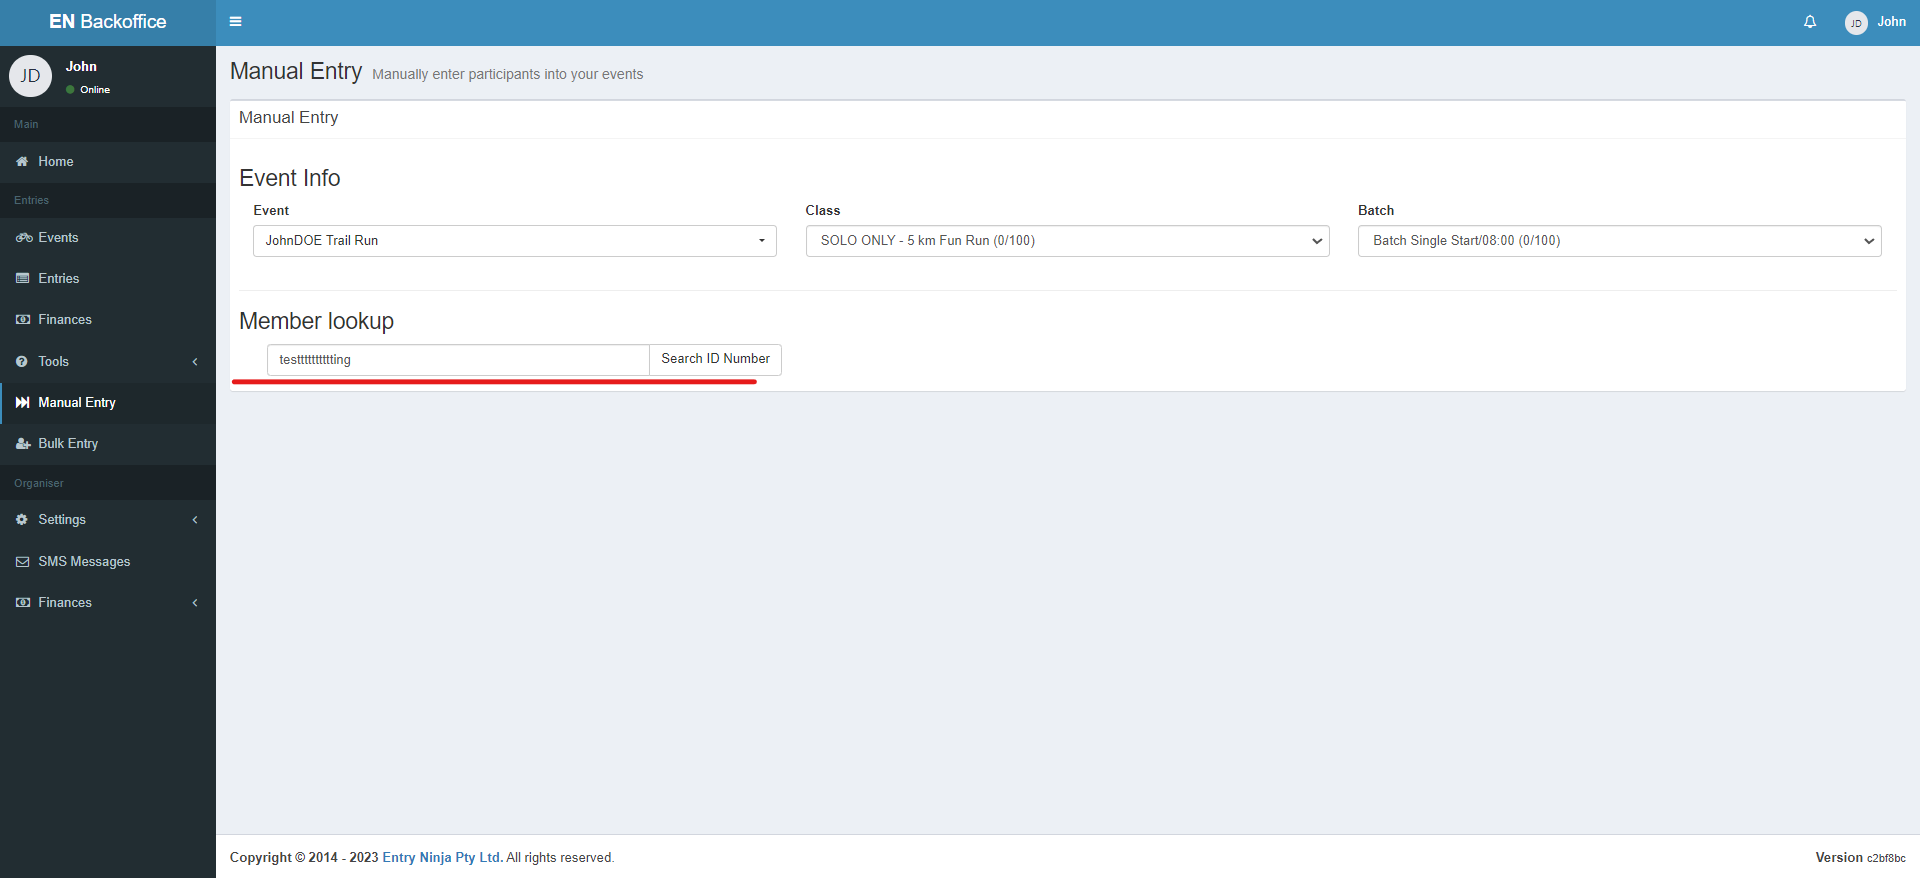
2. On the left side of your screen, click on the "Manual Entry" option in the Menu Bar.
Step 2: Access the Manual Entry Page
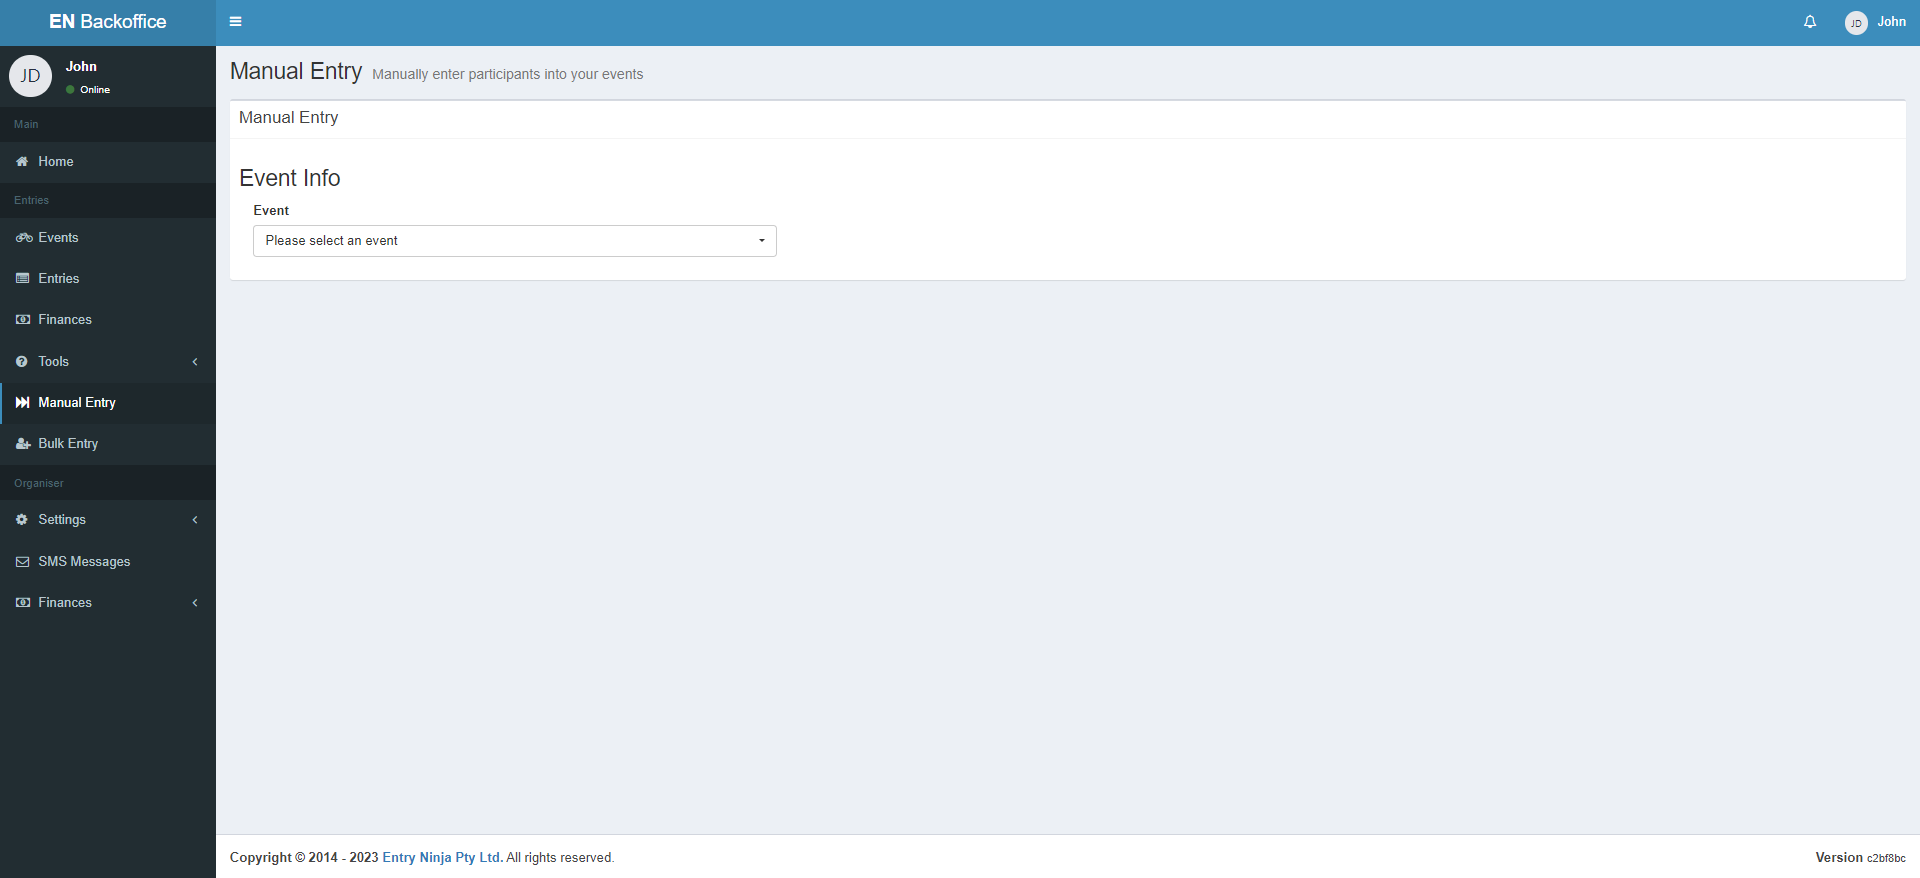
1. Upon clicking "Manual Entry," you will be directed to the Manual Entry page.
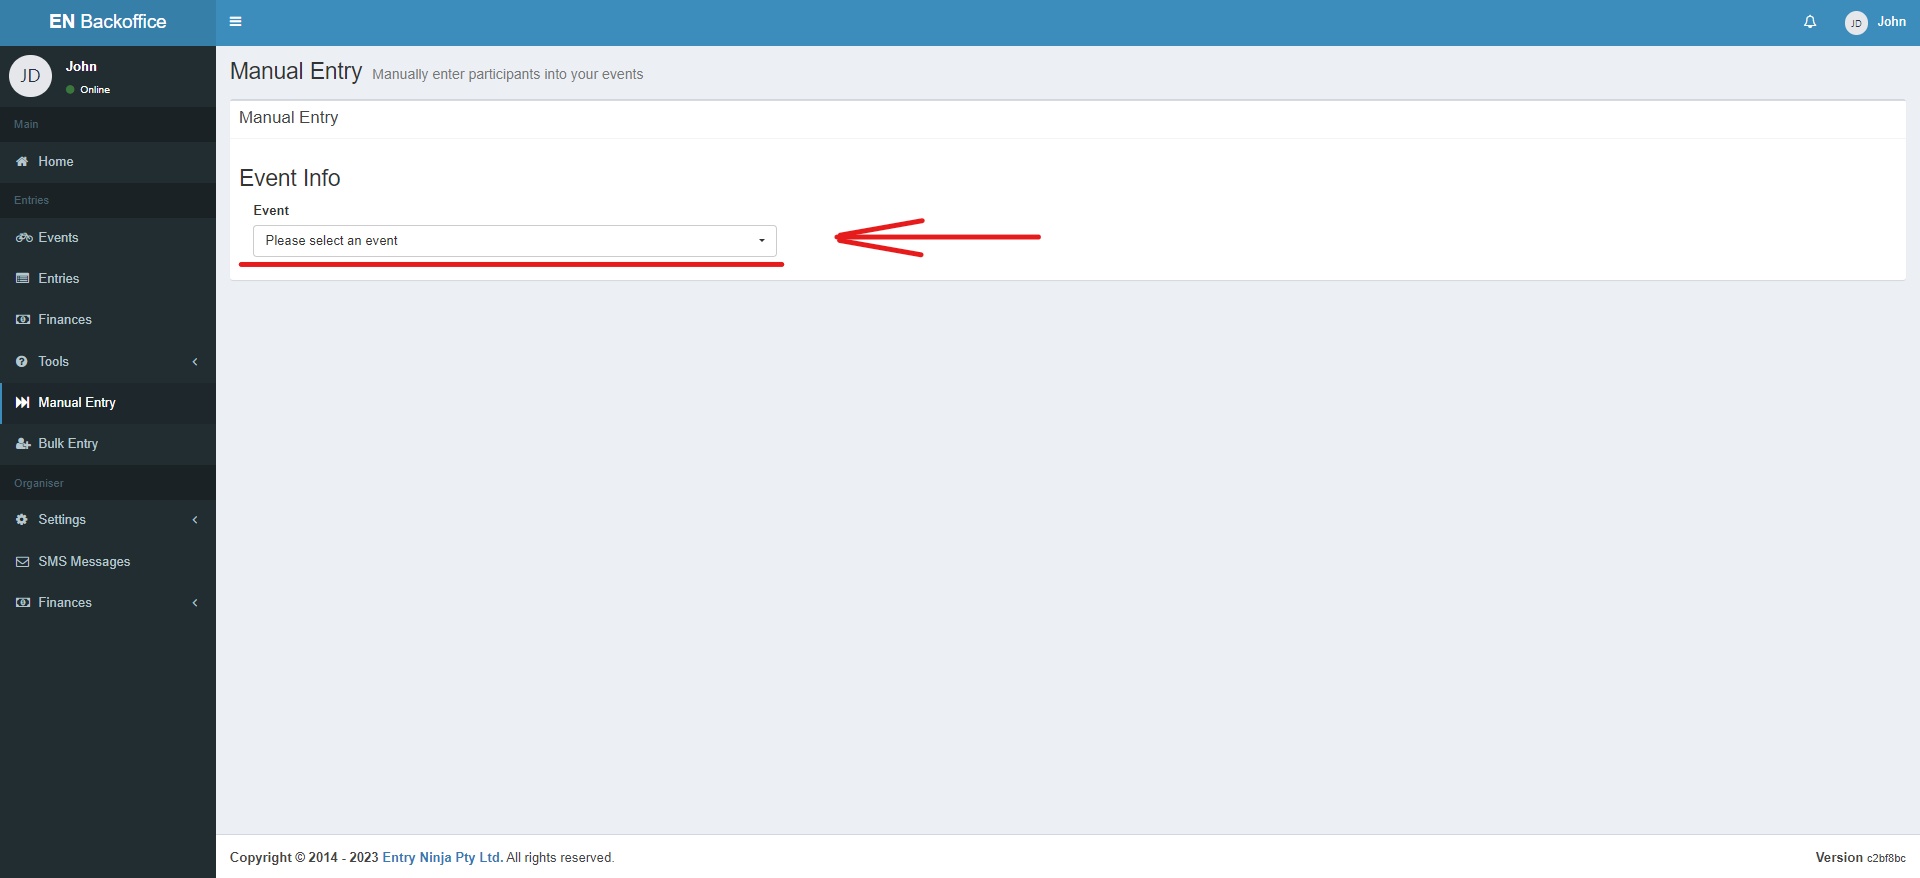
2. Choose the event for which you want to add the manual or complimentary entry.
Step 3: Select Class and Batch
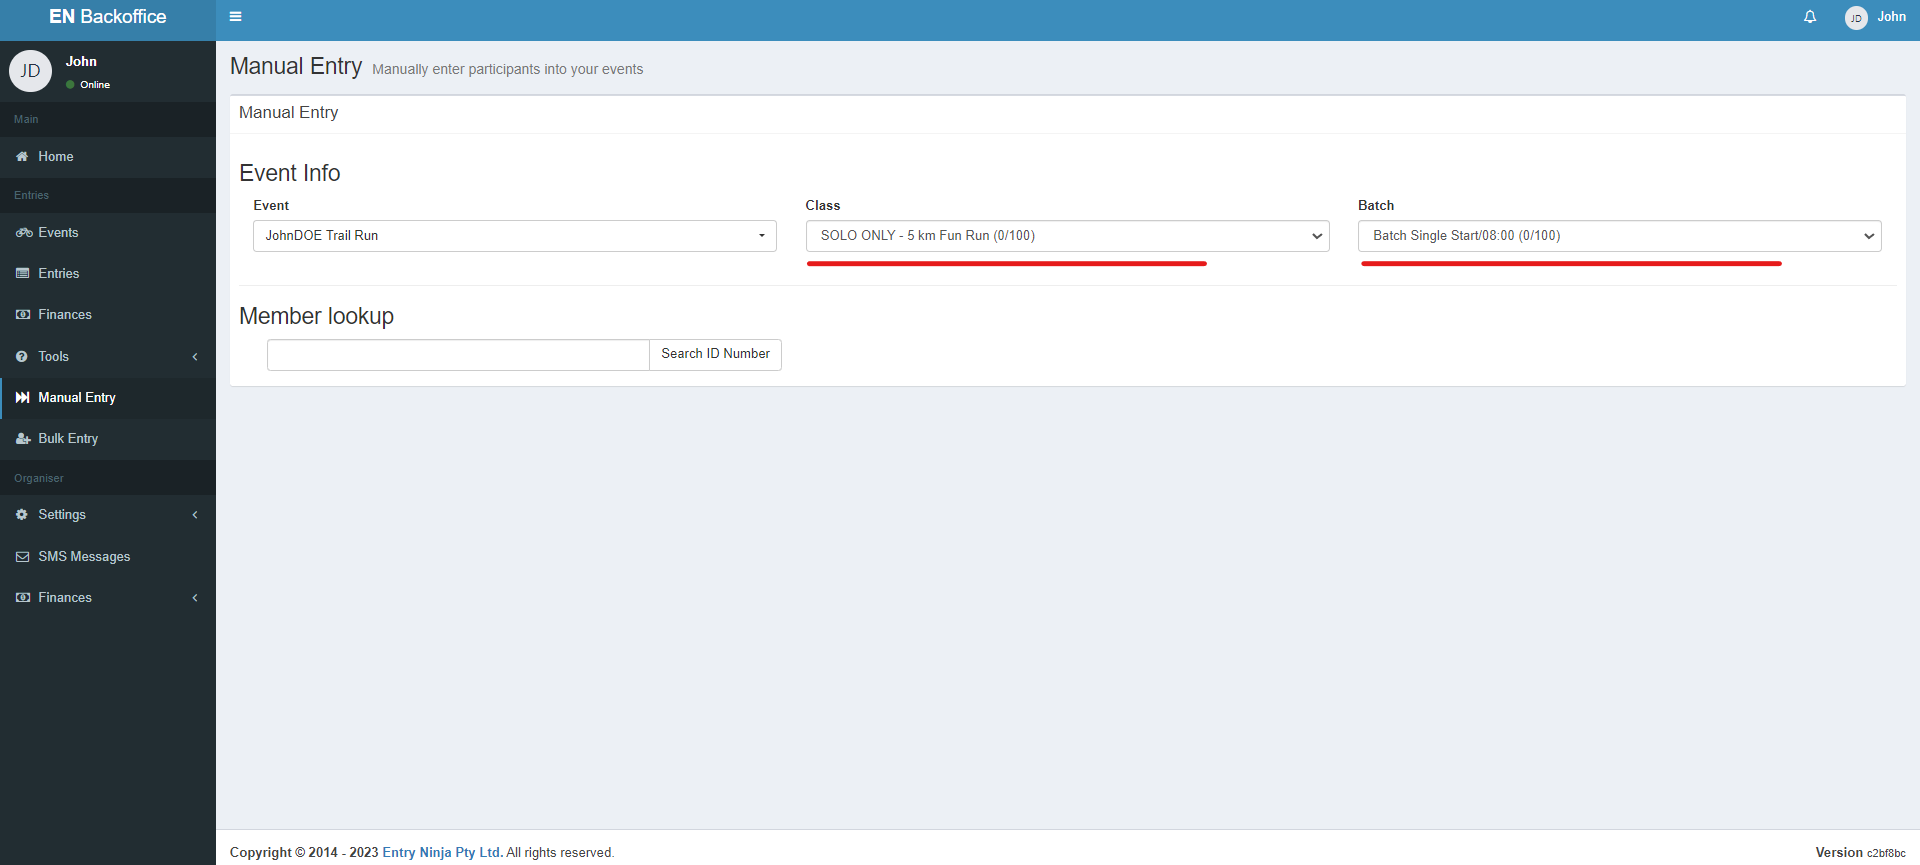
1. After selecting the event, choose the appropriate class and batch for the specific entrant.
Step 4: Member Lookup
1. In the "Member Lookup" section, enter the member's ID number. Please note that only ID numbers are acceptable for member lookup searches.
Step 5: Existing Member Profile
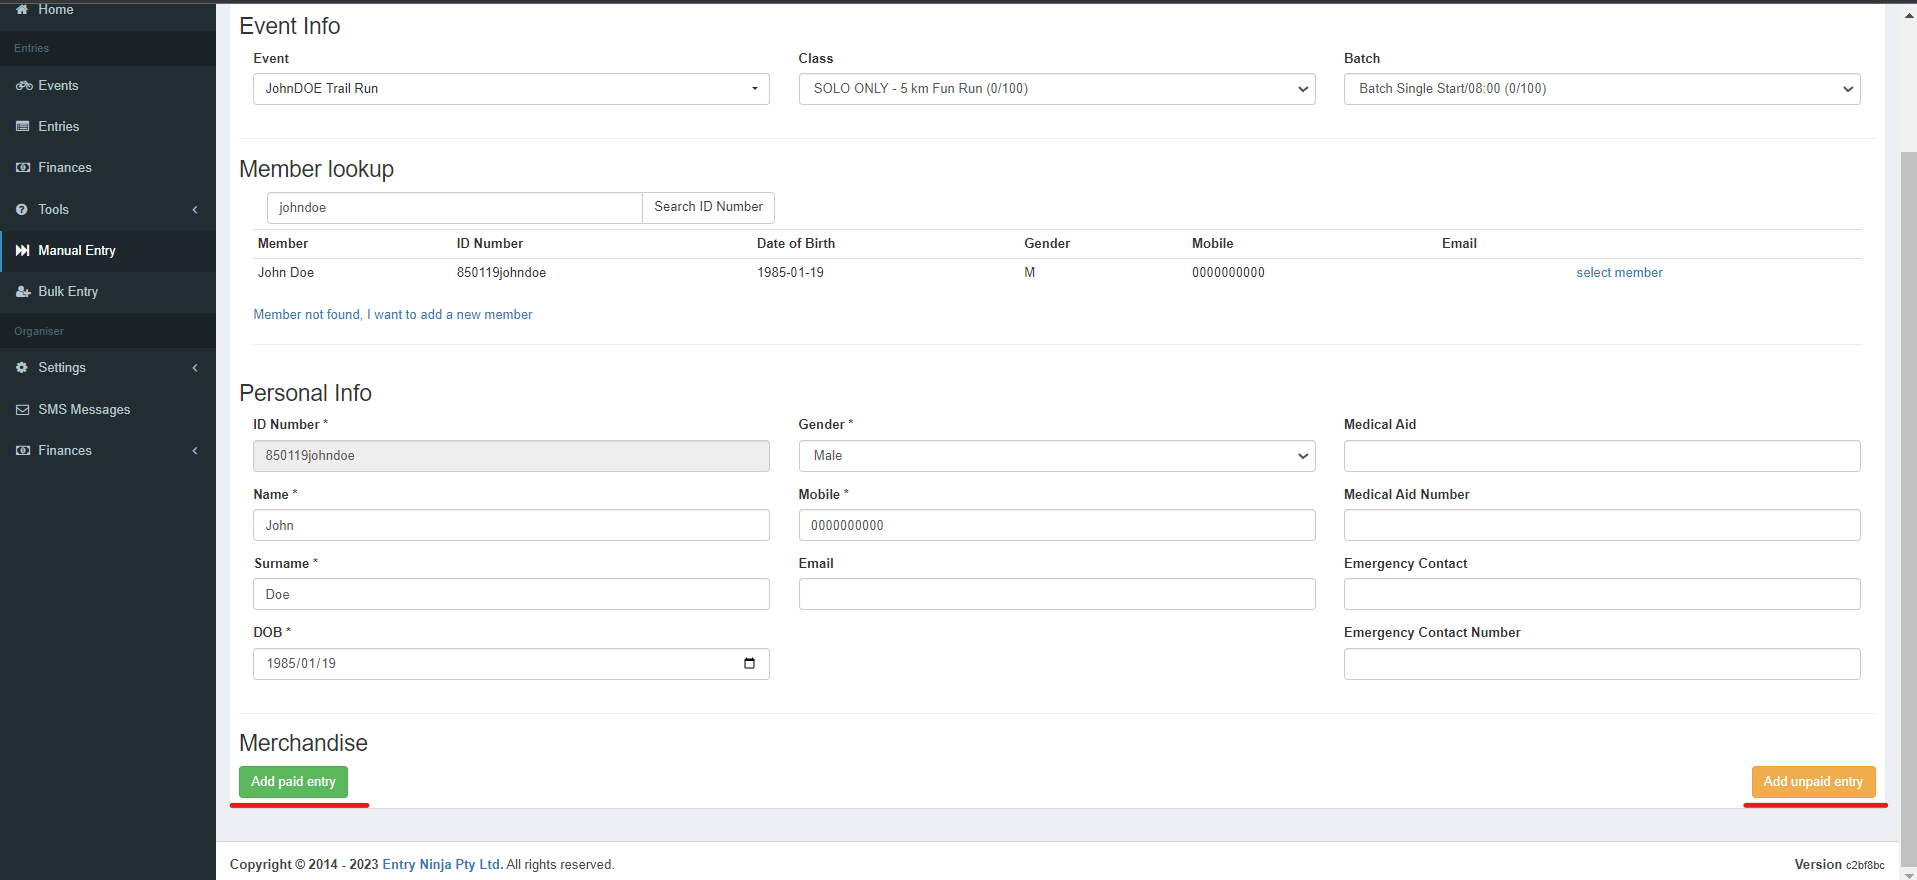
1. If the system finds an existing profile for the member within Entry Ninja, their details will be displayed.
Step 6: New Member Addition
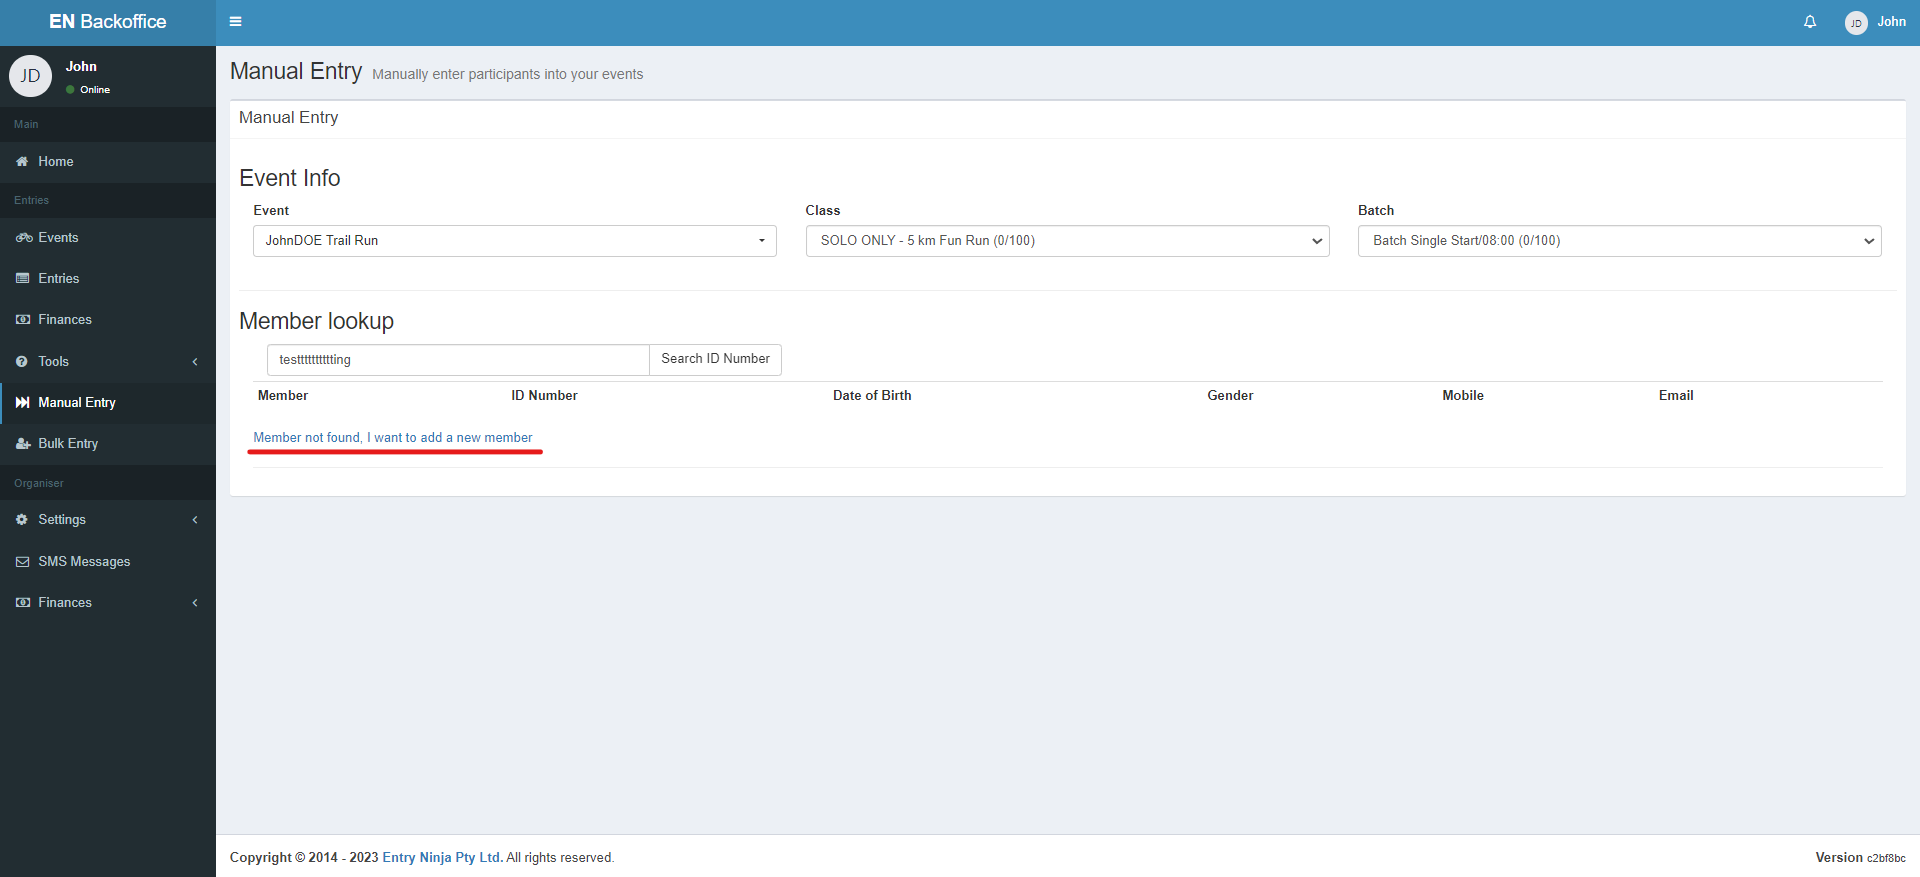
1. If the member is not found in the system, a "Member not found, I want to add a new member" message will appear. Click on this message.
Step 7: Adding Personal Information
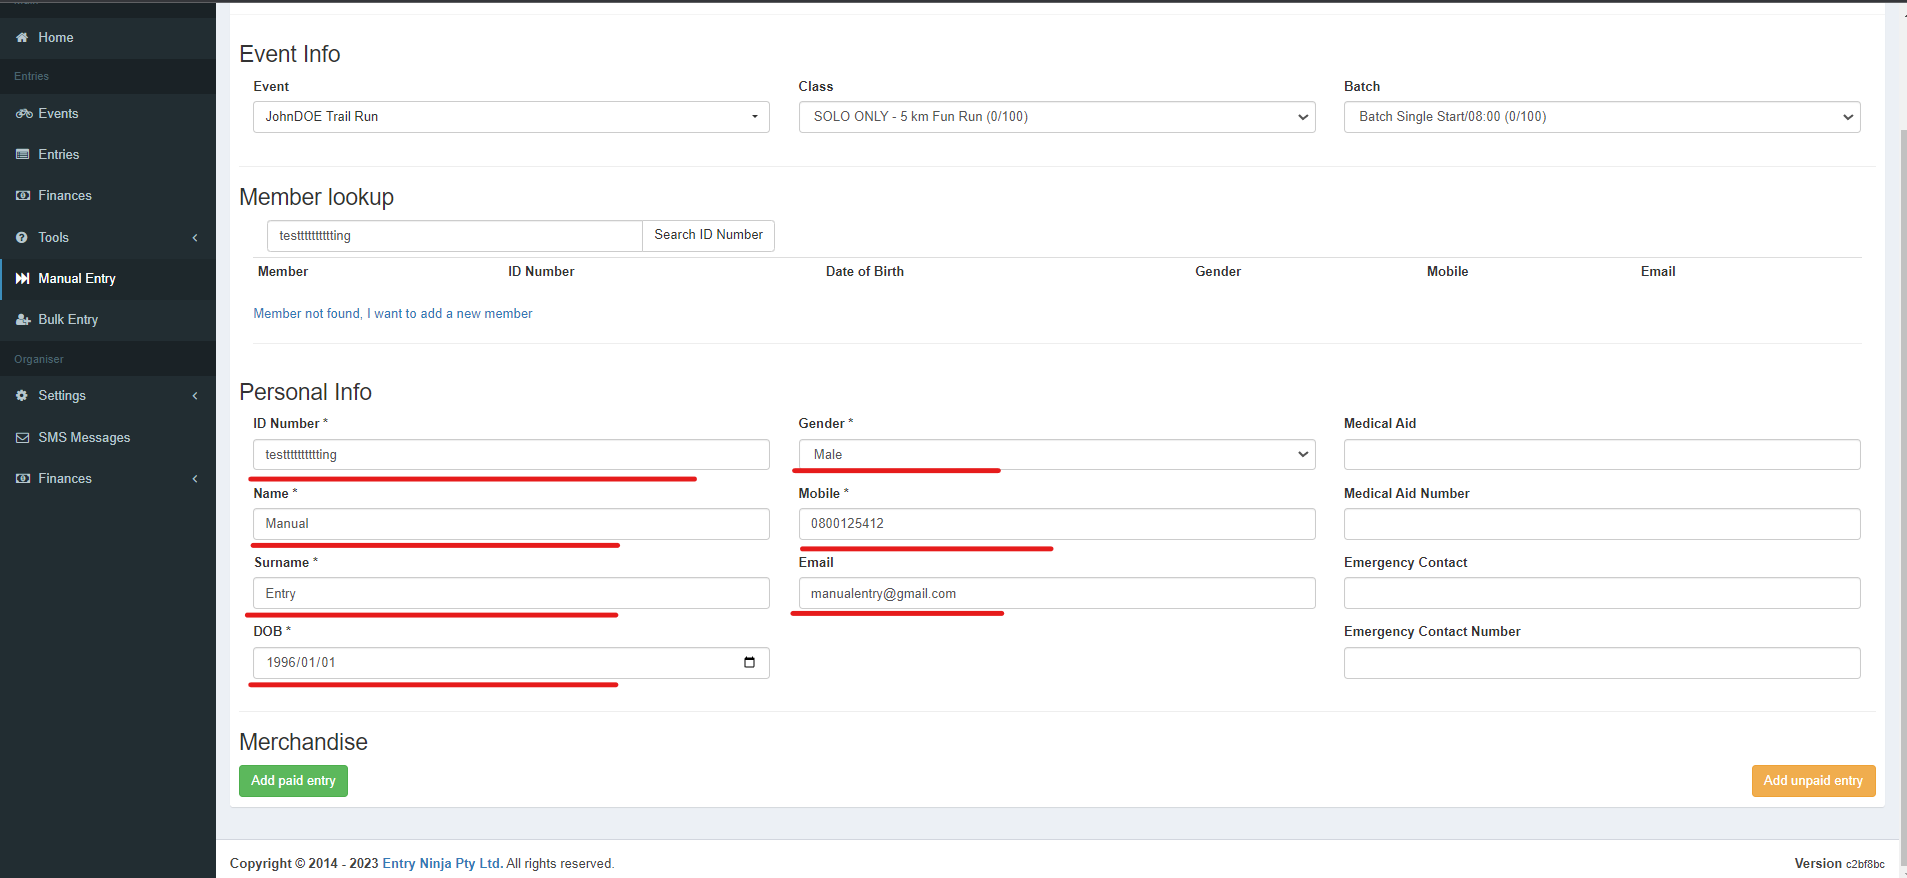
1. Clicking the "member not found" message will open the personal information section.
2. Fill in the required details:
- Name
- Surname
- ID number
- Date of birth
- Gender
- Email address
Step 8: Entry Type
1. After filling in the personal information, you will have the option to add the entry as a paid or unpaid entry.
Note the message at the top of the page "Manual entry created successfully. Click here to view the entry."

